


Friday, February 1, 2013
Another Squirrel
Since I had taken out a variety of things to complete our current Squirrely Challenge, I decided to make another card.
 My photo ended up crooked, but you can see the card. I really love the clock embossing folder - maybe I should use it more often!
Thursday, January 31, 2013
Squirrely Challenge
It has been a while since Nancy posted a Squirrely Challenge. Instead of a technique, we had a list of requirements to meet. The card needed to be masculine. It also needed to have been made using a tool, an embossing folder and something from your stash.
For my card, I chose a leaf punch for my tool. (technically not new, but then again I haven't bought any new tools in a while!) The wood banner was from my stash, as was all the card stock!
 You can see Nancy's cute banner card here.
For my card, I chose a leaf punch for my tool. (technically not new, but then again I haven't bought any new tools in a while!) The wood banner was from my stash, as was all the card stock!

Tuesday, January 29, 2013
Tuesday's Tag
For this tag, I decided to play around with a technique I saw on Claudine Helmuth's blog. I used a Prima stencil and a sponge with acrylic paints to create a background on cheap white tissue paper. By sponging on the paint, you have more control as the amount applied (which impacts bleed through and drying time). After I let it completely dry, I place a tag under the tissue to see where I wanted the design to fall. Once I like the placement, I cut out the tag shape.
A little gel medium on the tag was all it took to adhere the tissue to the tag. In smoothing it out, I did tear a bit of the tissue. So, I decided to add an image:
 I stamped the Tim Holtz umbrella man in Archival black. I re-stamped the umbrella portion in Marvy red and cut them all out. I used mounting tape to attach umbrella man to the tag. This will probably end up in an art journal.
A little gel medium on the tag was all it took to adhere the tissue to the tag. In smoothing it out, I did tear a bit of the tissue. So, I decided to add an image:

Monday, January 28, 2013
Simple
After stamping for many years, I always feel inclined to make elaborate cards. Unfortunately, my time is short and I would rather do a little something, rather than nothing at all. I'm sure there are others out there who feel the same. Plus, sometimes clean and simple is kind of a fun a change of pace. The cards below fit the bill - and will most likely be sent to Operation Write Home:
 The sentiment is made from letter stickers.
 The bottom curly line is a portion of paper tape. Both cards were made from kits from SimonSaysStamp.


Friday, January 25, 2013

Thursday, January 24, 2013
I was working through part of a SimonSaysStamp kit - just using items from the kit. For me, it's a good exercise in using imagination. It limits me to what is in front of me - any ideas on other images, embellishments are ignored. I thought this particular card came together nicely. Being a stamper, I tend to use stamped images as my focal. Not with this:
 The bird image on the bottom is part of the patterned paper. The large heart was cut from a traced pattern. This card will go into a batch for Operation Write Home. Pull a patterned paper from your stash and give it a try.

Tuesday, January 22, 2013
Tuesday's Tag
My friend, Nancy, gave me this wonderful collection of patterned papers and embellishments from My Mind's Eye(Ruby). The papers colors of reds, pinks, white/cream and gray are very versatile. I decided on a French twist - I think this will make a fun addition to a card!


Monday, January 21, 2013
Unpacking...
I spent Friday through Sunday at a Crop. Some Close to my Heart demonstrators sponsor a "Diva Crop" - art space, hotel room and food for one reasonable cost at a local hotel. My main goal was to get some photos scrapped on to pages. Not complete pages, but just onto pages. Scrapping is my least favorite paper arts activity. Unfortunately, I have a bunch of photos that need a home. So, I decided to match up photos with pre-made pages and bring them along. I figure I can go back when I only have a limited amount of time ad title, journal and embellish. It was quite successful:

 Photo one is a top view of the 2 12 x 12 packages of layouts and photos. The lower photo is a side view of the completed pages. It took me Friday (started around 4:30pm) and most of Saturday, but they are done to the point I wanted. Then, I dove into some SimonSaysStamp cards kits to play:
 I made these rather simply so that I can send them to Operation Write Home. Thus ended a very satisfying weekend (can't wait to do it again!)


Friday, January 18, 2013
Thank You
I'm slowly, but surely, getting my holiday thank you cards done. After cutting and matting some patterned paper strips, I decided I needed a variation. Using some of the same strips and adding some stamps:
 The background stamp is by Hero Arts and has quickly become a favorite!

Thursday, January 17, 2013
I wasn't quite ready to put away my holiday patterned paper. So, with a bit of mixing and matching, fun winter card fronts. I cut 5 strips into 3/4 x 3 3/4 (or close to it) and mounted them to a black mat.
 I added a snowflake stamp from Stampin' Up and a little "thank you". Some of my Christmas "thank you" cards are complete. And, it all came from my stash!

Tuesday, January 15, 2013
Tuesday's Tag
Tuesday's tag was a throw back to my scenic stamping days (albeit much more simply done). I stamped a Hero Arts chevron/snowflakes background in Versa Mark ink. After it was dry, I added a few colors of blue Distress Inks. The trees and deer came next:
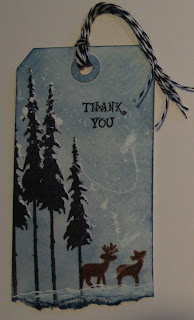 I used white acrylic paint to add some snow to the trees and ground. I flicked a bit more paint on the background. Lastly, I added a Stampin' Up sentiment and baker's twine (that I didn't have to make!) Trees are by Stamper's Anonymous/Tim Holtz and the deer are CTMH (Close to my Heart).

Monday, January 14, 2013
Journaling
It has been awhile since I did anything creative. The holidays, family, and mom's trust business have taken up my time. I did get a few minutes recently to work on journal pages for a swap. With all the travel over the past months, this is what came to mind:
 Now, this is a fairly simple page for me. I did a bit of layering of mists and inks on the background. I stamped a new Unity cloud background to add some interest. Of course, I needed to add a bit of a twist, so I added a heart from Rubber Baby Buggy Bumpers...
 The house stamp is from Hero Arts -it's one that I have frequently used!


Monday, December 24, 2012

Ready!

Friday, December 21, 2012
We wish you....
I finally finished my Christmas cards. It was rough going as I just had no idea what I wanted to do. Since getting into the Holiday spirit has been difficult, I decided to go very simple this year. So, I used some pre-cut card kits (leftovers from Club Scrap kits) and stamps from Close to My Heart:
 The nesting dies are by Stampin' Up! Not one of my more spectacular efforts, but at least they are done!

Thursday, December 20, 2012
Gift Tags
I think I've made enough gift tags for Christmas. My goal to use my stash of patterned paper has worked well. I have also been using die cuts quite a bit. For the gift tags below, I folded patterned paper in half and positioned in in the Sizzix/Tim Holtz ornament die so that the fold was below the to cut line. Thus, it makes a mini ornament card. I ran a complimentary paper through the die again to cut out the top of the ornament.
 I stamped and punched put the center circles. Super easy! I made the tag below similarly using the Sizzix/Tim Holtz dwellings die:
 You can see the top is a bit flat due to the fold. Take a look at your dies - there may be some that would make a perfect fold over card.


Tuesday, December 18, 2012
Tuesday's Tag
For today's tag, I took out (of the package) a couple of new stamps. The background is by Hero Arts - love it!
 It was stamped in Distress ink, but seemed a bit too dark for what I wanted to do. Enter Distress Stain in Picket Fence - it toned it down a bit. I stamped the bird (My Mind's Eye from the Merry and Bright collection) onto the tag in black. I then re-stamped it on a separate piece of card stock in Barn Door Distress ink. I cut out the bird and mounted it over the black image with mounting tape. The flowers were also re-stamped onto white card stock, cut out and mounted over the original image. I added some Straw Distress Stickles to the center.
From a scrap of Merry and Bright paper, I die cut the lace edge on the left. I used the same print to punch out different size snowflakes. I added a smear of glitter glue to the snowflakes. Here's a close up:
 Last of all, I stamped the sentiment (My Mind's Eye Merry and Bright) and cut out the banner. It was also added to the card with mounting tape. Finally, I stained some cream ribbon with Stormy Sky Distress Stain. I did use the papers and tag from my stash, only the stamps were new!

From a scrap of Merry and Bright paper, I die cut the lace edge on the left. I used the same print to punch out different size snowflakes. I added a smear of glitter glue to the snowflakes. Here's a close up:

Monday, December 17, 2012
Some Favorites
A few years back, I was debating about getting a Big Shot by Sizzix. After all, I didn't like to use die cuts. I had steered clear of them for decades. But, I did like embossing folders, so I figured why not get the Big Shot. One of the best tools I ever bought. I think this is pretty funny since almost all the cards and tags I have been making use a die cut!
I made the card below for a friend. The snowman in the fold-over card. I folded white card stock in half and the put the fold just below the top of the hat. That way, it doesn't cut through:
 After die cutting, I opened the snowman up and placed the front into a snowflake embossing folder. I slightly inked the raised snowflakes and smeared on a bit of glitter glue. The photo below shows how the snowman opens. The banner is made from a SimonSaysStamp thin die (a new favorite!). I mounted the snowman to the card with mounting tape.

I made the card below for a friend. The snowman in the fold-over card. I folded white card stock in half and the put the fold just below the top of the hat. That way, it doesn't cut through:


Thursday, December 13, 2012
Sweet Treats
I had invited my gym buddies over for a lunch, a thank you for all the support they have given over the past half year. I was thinking of making a cute holiday favor for them to take home. Opening my drawer of dies, I embarrassingly recalled that I had bought the Stampin' Up matchbox die and never used it! No time like the present...
I used a couple of patterned papers, instead of card stock. I wasn't sure how sturdy they would be so I did make a test box. Thankfully, they worked beautifully:
 I made the lid from printer transparencies. It was thin enough that I didn't need to score it to wrap it around the little box. I used my ATG gun to adhere it together. Since you can still see a bit of the glue line, I placed the ribbon around the box at the seam and tied a bow. Below is the bottom view, you can see I still needed to adjust the ribbon:
 They were a big hit, thankfully. And, I stayed with my resolution to use my stash - including old "new" dies!
I used a couple of patterned papers, instead of card stock. I wasn't sure how sturdy they would be so I did make a test box. Thankfully, they worked beautifully:


Tuesday, December 11, 2012
Tuesday's Tag
I had a weekly feature, Tuesday's Tips, for a couple of years. I haven't really posted any new tips for awhile - been distracted with real life. So, for a twist, I thought I would have Tuesday's Tag. I figure it will help me get tags done for Christmas. Plus, I can make some for gift tags for a variety of occasions. For the tag below, I used a Darcy's Christmas set:
 I stamped a swirl in gold and silver inks, then lightly sprayed with Glimmer Mist. The tree was stamped with Bottle Adirondak. I stamped the frame and greeting, cut them out and mounted it to the card with mounting tape. Quick and easy - which is something I need!

Monday, December 10, 2012
Let it Snow
One of the more interesting card sketches this season has layered stamping. I was playing around with this technique using some snowflake stamps and Distress Inks.
 To make it a bit easier to stamp, I used re-positionable adhesive to keep my white panels in place. The sizes of the white panels are:
5 1/4 x 4
4 1/4 x 3
3 1/4 x 2
The blue card stock sizes are:
5 1/2 x 4 1/4 (fold over card)
4 1/2 x 3 1/4
3 1/2 x 2 1/4
Super easy to cut and the card comes together quickly, The plastic snowflakes have a bit of iridescent glitter glue. I threaded a scrap of home made twine in red and white.

5 1/4 x 4
4 1/4 x 3
3 1/4 x 2
The blue card stock sizes are:
5 1/2 x 4 1/4 (fold over card)
4 1/2 x 3 1/4
3 1/2 x 2 1/4
Super easy to cut and the card comes together quickly, The plastic snowflakes have a bit of iridescent glitter glue. I threaded a scrap of home made twine in red and white.
Friday, December 7, 2012

Thursday, December 6, 2012
I was originally going to post this tag on Tuesday, but jumped the gun and posted a card instead. This tag was made while I was playing with my new falling stars die. I added the row of house (Sizzix/Tim Holtz) and couple of Stampin' Up tag images. At the bottom. I made a mixture of white flocking and glitter to imitate snow. All tied up with homemade twine!


Tuesday, December 4, 2012
Falling Stars
I recently purchased a couple of new dies, mainly for backgrounds. I love the Falling Stars thin die made by Memory Box for SimonSaysStamp. I decided to combine it with another die I bought some time ago (and never used!)
 After assembling the pieces, I decided to add my "homemade twine" and a mini tag (from Stampin' Up). I added a bit of glitter glue -
 Loved the way this card turned out. It may be a future Christmas card...


Monday, December 3, 2012
Merry and Bright

I wanted to make it simple and easy since I needed a dozen or so. I "second generation" stamped the sentiment "May all your days be merry and bright", and over stamped the "You're Invited" in a deep eggplant color. I love the subtle contrast that the two colors bring. Originally, that was going to be the entire card...but I decided to punch and stamp the mini tag (Stampin' Up!). Then, I needed twine...to match....So, out came the markers and white twine to customize the color. It was a long process making the twine for 12 cards, but I am pleased with the final product!
Friday, November 30, 2012
Merry

Wednesday, November 28, 2012
Christmas Deer...

Monday, November 26, 2012
Tags

Friday, November 23, 2012
Squirrely Challenge
It has been a while since I participated in my friend, Nancy's, "Squirrely Challenge". This was a simple charge - use Washi tape. If you have read my blog for some time, you know this was right up my alley! It seems as if Washi tape is everywhere - but is it actually Washi Tape?
Washi is a type of paper from Japan, often used in Origami. The tape is made similarly - often from pulpy paper sources. It has a distinctive weight and finish (both the paper and the tape). There are a lot of decorative tapes out now - some are true Washi, while others are tissue or craft tape. The Tim Holtz/Ranger products are tissue tapes. They are made differently, have a different texture and adhesive. The behave differently, particularly with wet media.
All that being said, I used a variety of tapes on this card for the challenge:
 The trees and striped tapes are "craft/tissue" tapes and the blue text is actual Washi tape. The "Keep Calm and Merry On" is from a clear set of Darcy's Christmas stamps. Had a bit of a problem as the stamp is not very deeply etched. It will definitely require "surgery"! The embossing folder used on the card is by Stampin' Up. I made my own red and white twine with string and a Sharpie!
Washi is a type of paper from Japan, often used in Origami. The tape is made similarly - often from pulpy paper sources. It has a distinctive weight and finish (both the paper and the tape). There are a lot of decorative tapes out now - some are true Washi, while others are tissue or craft tape. The Tim Holtz/Ranger products are tissue tapes. They are made differently, have a different texture and adhesive. The behave differently, particularly with wet media.
All that being said, I used a variety of tapes on this card for the challenge:

Thursday, November 22, 2012

Wednesday, November 21, 2012
Since I pretty much missed October, I decided to use a few new items that I purchased to make Halloween cards. At least it's still Fall!
 The latest journal page for my swap with Kate. Stains, sprays, inks used with stencils and stamps. The fun Halloween saying is from Artistic Outpost. I had "Nightmare Before Christmas" playing in the background - the three fellows in the circle (Stampotique) reminded me of Oogy Boogy's henchmen!

Monday, November 19, 2012
Cheer

Thursday, November 15, 2012
Grateful

Wednesday, November 14, 2012
Just for Fun

Monday, November 12, 2012
A Bit of the Holidays

Friday, November 9, 2012
Faux Fresco
I signed up for an online card class, Holiday Card Workshop, to get back into the spirit of creating. Plus, I really need some Christmas card ideas for this year's cards. One of the techniques demonstrated was a "Faux Fresco" using an embossing folder,markers and paint or Distress Stains. I cut my embossed card stock in half to create 2 cards using this technique - one with white paint and one with white Distress Stain.
 The folder is by Cuttlebug, actually both folders used are from them. After running a piece of card stock through my Big Shot, I very sloppily colored with light markers (an eggshell/light tan and a light blue/aqua). Once dry, I dapped a Ranger white paint Dabber (top card) and Picket Fence Distress Stain (bottom card). When the panel was dry, I sponged along the edges with Old Paper Distress Ink. I used glossy card stock, since I already had it on my desk. I think I might try again Bristol for a different look.

Wednesday, November 7, 2012
Finally...
That word sums up a lot of things going on in my life. I am finally able to move forward a bit since my mother's death in September. I am finally accepting that some extended family relationships are over due to egregious behavior on the part of these relatives. I can finally move forward with settling the trust. And, I am finally feeling a bit more creative.
 I made this journal page (not my favorite as I am a bit rusty) in an attempt to get back to art and to move forward. Finally!

Thursday, September 27, 2012
Thoughts...
I have been art journaling for years. Love the free form and mixed media - especially since it's a great place for me to express my unusual taste in non "mainstream" stuff. Usually, I am a visual journaler - maybe adding a quote or a word or two. I've never been a writer or chronicler of my life.
Since July, I have been traveling to and from So. Ca. to visit my ailing mother. I am of the "sandwich" generation - squeezed between helping/supporting college age children and taking care of my mother. Things have not been going well - a meddling relative helped to convince my mom to go against our wishes, medical advice, and, quite frankly, common sense. So, she is not doing well. I have some decisions to make...
Enter art journaling. I need somewhere to write it out (so as not to continually vent to my friends - several of whom have been great). Since, I am not one of many words, it is a unique experience. I picked a book called "Picture Frames", which I will alter and use as a journal. I cleared out some pages, glued some together for strength, and gesso-ed the first dozen or so. I think it will be a combination of my usual style and some writing. I thought I would stay with the "frame" idea - adding page or image frames on my pages. My first couple of pages:
 I picked 6 spray colors to use as a palette. I like the fact that the pages are visible even after adding the gesso and sprays.
As I will be continuing to fluctuate between No and So California, my posting will be anything but consistent. Plus, I do not want to post only the tough times I am having. So, I hope you pop in occasionally to see what's going on. I'm hoping for a bit mind clearing to help my creative process.
Since July, I have been traveling to and from So. Ca. to visit my ailing mother. I am of the "sandwich" generation - squeezed between helping/supporting college age children and taking care of my mother. Things have not been going well - a meddling relative helped to convince my mom to go against our wishes, medical advice, and, quite frankly, common sense. So, she is not doing well. I have some decisions to make...
Enter art journaling. I need somewhere to write it out (so as not to continually vent to my friends - several of whom have been great). Since, I am not one of many words, it is a unique experience. I picked a book called "Picture Frames", which I will alter and use as a journal. I cleared out some pages, glued some together for strength, and gesso-ed the first dozen or so. I think it will be a combination of my usual style and some writing. I thought I would stay with the "frame" idea - adding page or image frames on my pages. My first couple of pages:

As I will be continuing to fluctuate between No and So California, my posting will be anything but consistent. Plus, I do not want to post only the tough times I am having. So, I hope you pop in occasionally to see what's going on. I'm hoping for a bit mind clearing to help my creative process.
Tuesday, September 25, 2012
Tuesday's Tip
With all the traveling to and from Southern California (I live in Northern California), it's been difficult finding creative time. Lately, that includes reading and research. While my life is still in flux, I will be suspending Tuesday's Tips until things settle down a bit - let me know if you find some new and exciting idea to share!
Monday, September 24, 2012
I had a few moments recently, and thought it would be a good time to start on the shadow box I painted a few weeks ago. I used a page of Carta Bella's All Hallow's Eve, some ephemera and a glass bottle:
 I used black alcohol ink to color the bottle. Drip a couple drops into your glass and rotate the bottle for coverage. The bird cage is a 3-D acetate sticker.
 This is a close up of the top slot. I have a few more things to add here - possible some pen nibs, etc.


Tuesday, September 11, 2012
Tuesday's Tip
In my quest to find some creative inspiration, I found a fun little tip involving children's art work. I had saved my kids art for many years until I hit upon the idea to photograph it. Easier to have the photographs - they take up less space - and I could scrap them projects in the school albums.
I came across a fun idea while taking an on-line class by Claudine Helmuth. You could create a collage of your children's art. Cool idea for a playroom or child's bedroom wall. Plus, you can rotate the projects. I thought it might be neat to (first photograph the complete project) cut it up and use it in your own art journals or collage.
I came across a fun idea while taking an on-line class by Claudine Helmuth. You could create a collage of your children's art. Cool idea for a playroom or child's bedroom wall. Plus, you can rotate the projects. I thought it might be neat to (first photograph the complete project) cut it up and use it in your own art journals or collage.
Friday, September 7, 2012
A Bit of Washi
I had made the base of this card a while back. I love Washi tape and tend to use it a lot, particularly in art journals. When I received this floral tape from my friend Sherry, I knew it would make a fun background. So, I just cut a panel and taped away!
 It was quick and easy - and I really love the shades of blue in the tape. Since tapes are the hottest product out there, you will have a variety from which to choose for backgrounds and accents! I added colored card stock (Club Scrap) and some Stampin' Up stamps and punch. I used Distress markers to color the inside of the flowers. It is difficult to see, but I used a vine embossing folder on the brown strip. Quick and easy, especially if you have pre-made bases!

Subscribe to:
Posts (Atom)


